How to Book Train Tickets on the New IRCTC Portal (2026 Step-by-Step Guide)
IRCTC has rebuilt its ticket booking website, and the new portal (currently marked BETA) looks and works quite differently from the old one. Everything now sits on a single scrolling page: you search, review, add passengers and pay without hopping between screens.
Below is the complete booking flow captured screen by screen on the new portal, from an empty search box to a confirmed PNR. Every screenshot is from a real booking — personal details have been masked.
Booking on the new IRCTC portal, step by step
Step 1
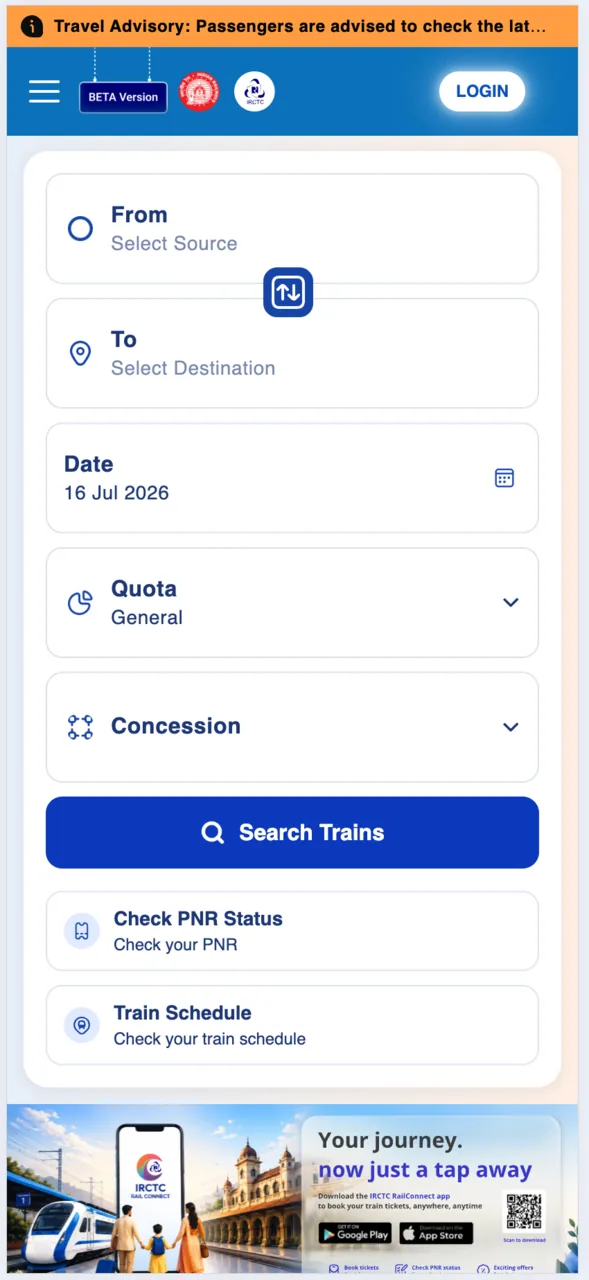
Open the new IRCTC booking portal. Tap From to pick your boarding station.
Step 2
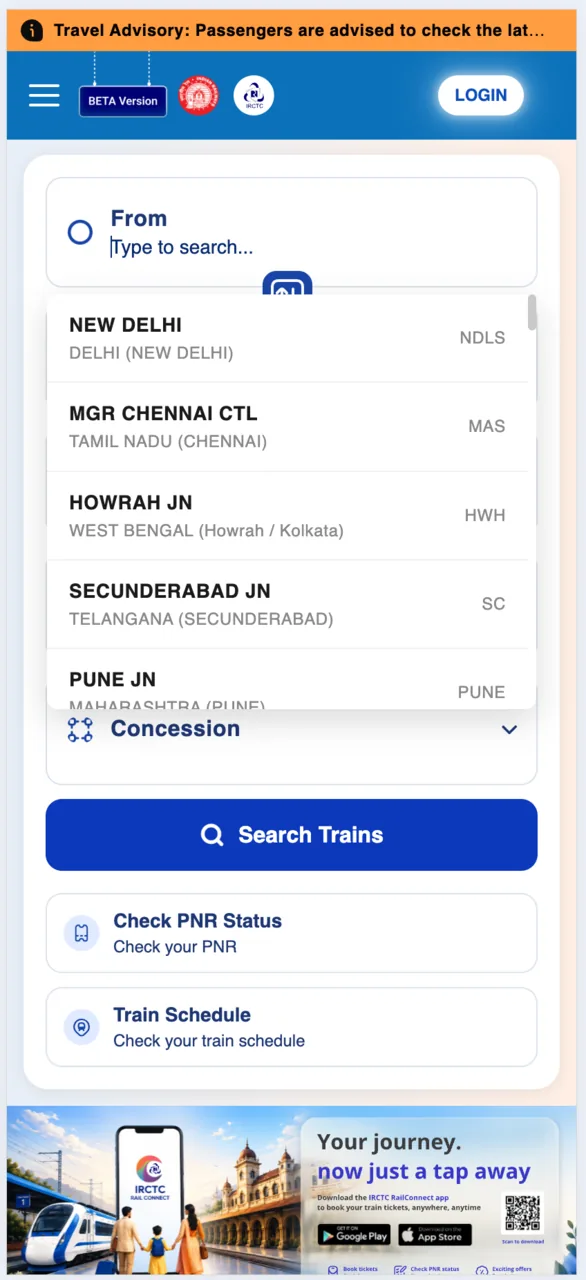
Start typing your station name, then pick it from the list.
Step 3
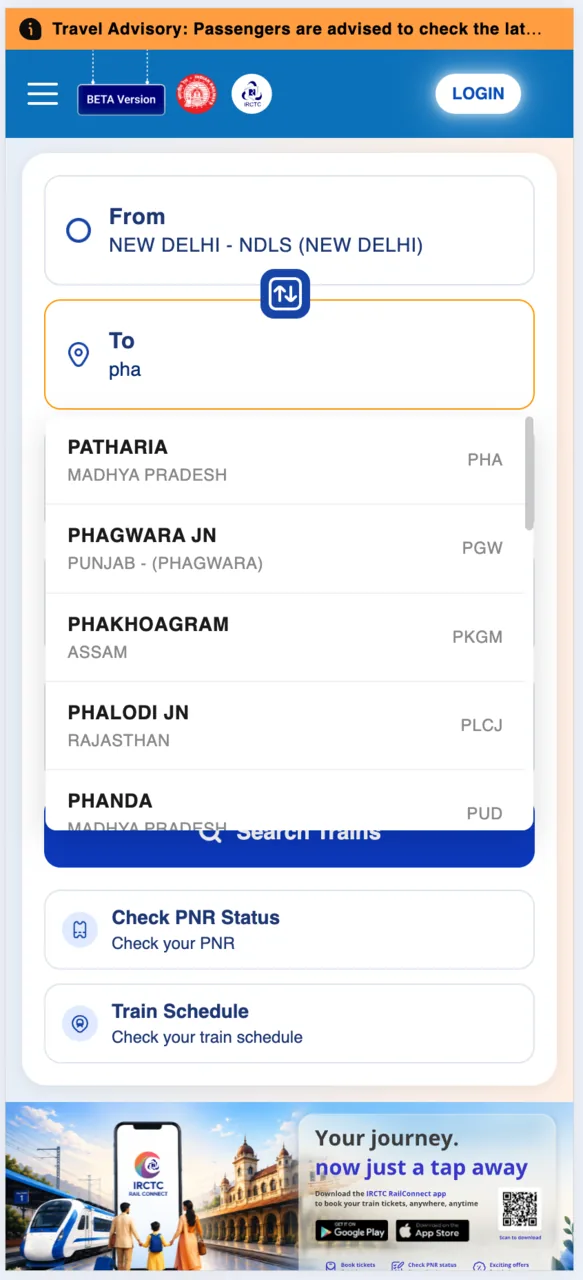
Tap To and type your destination. Here we picked Phagwara Jn (PGW).
Step 4
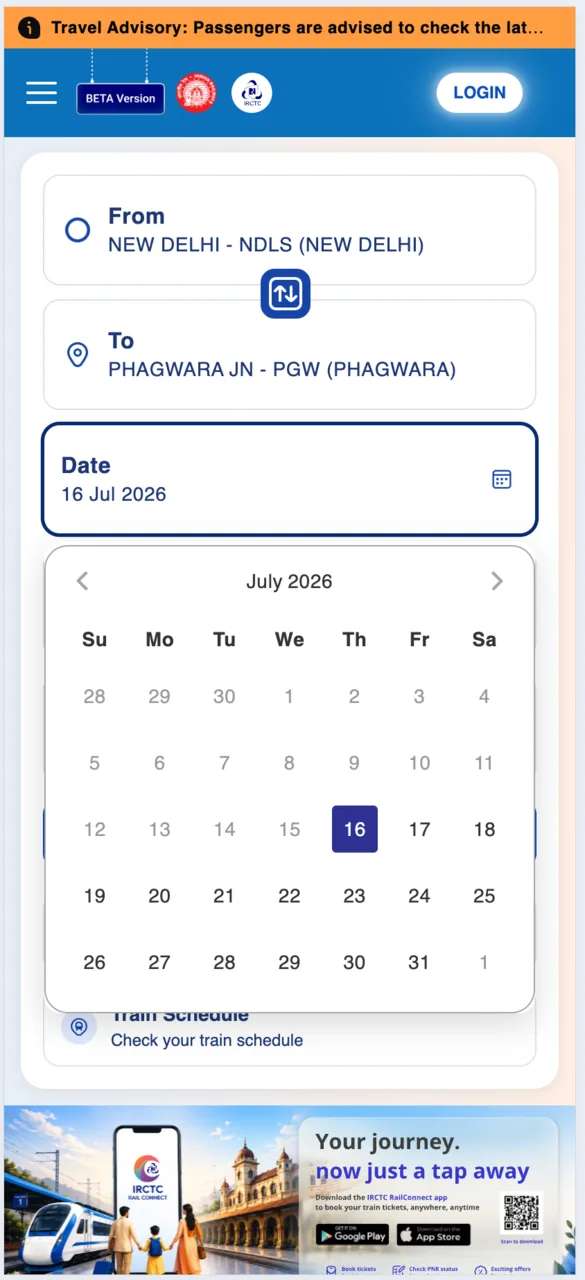
Tap Date and choose your journey date from the calendar.
Step 5
Pick your Quota. Leave it on General unless you qualify for another.
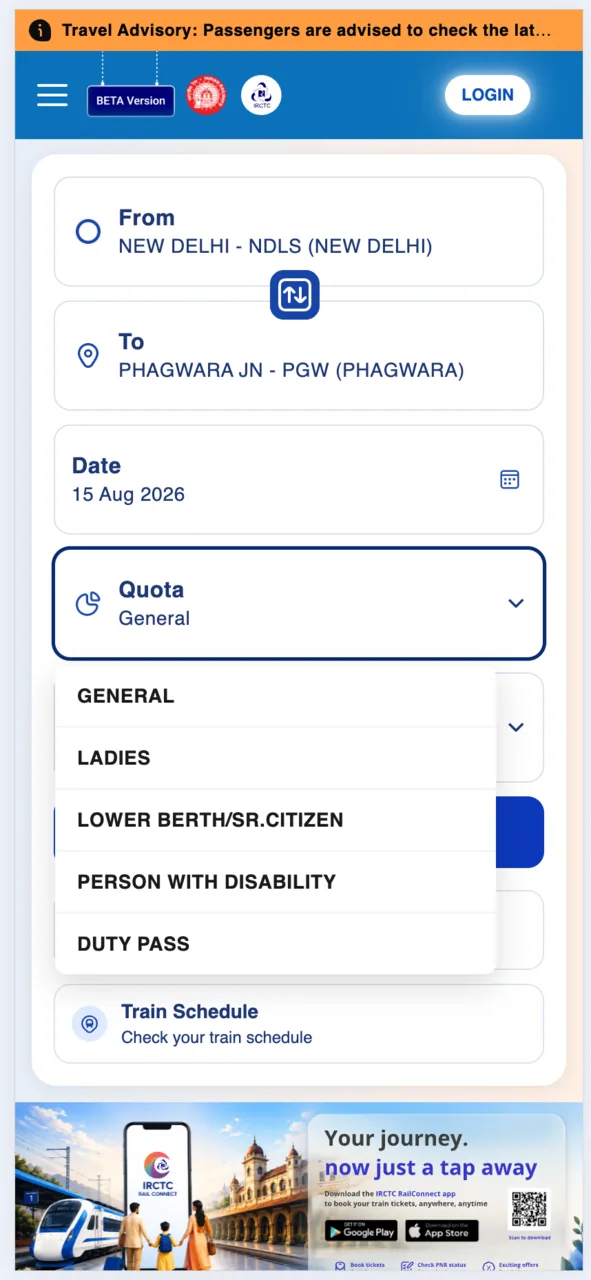
Step 6
Choose a Concession if one applies to you, then tap Search Trains.
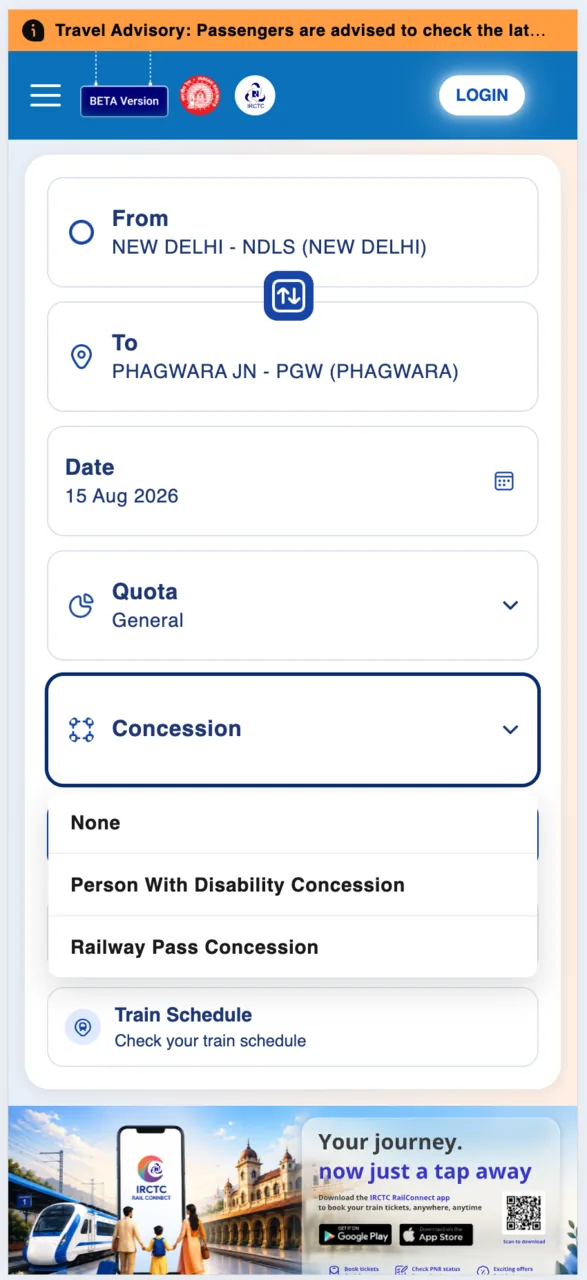
Step 7
All trains on your route appear. Use the date strip to check nearby days.
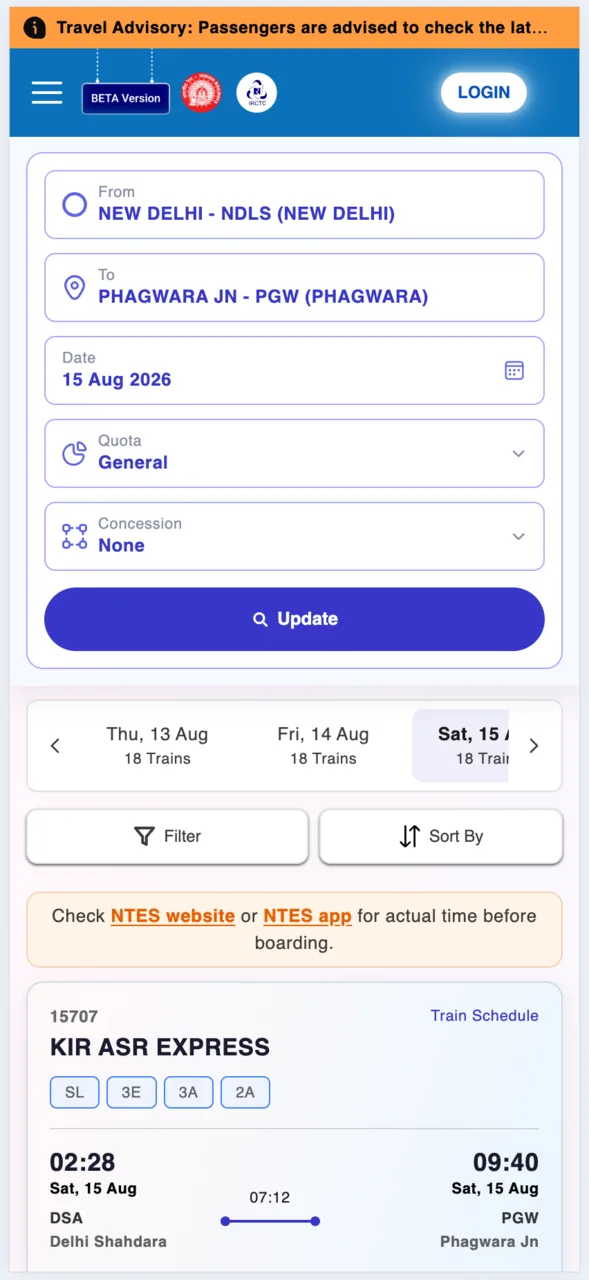
Step 8
Tap Check Availability to see each class, its fare and free seats. Tap BOOK.
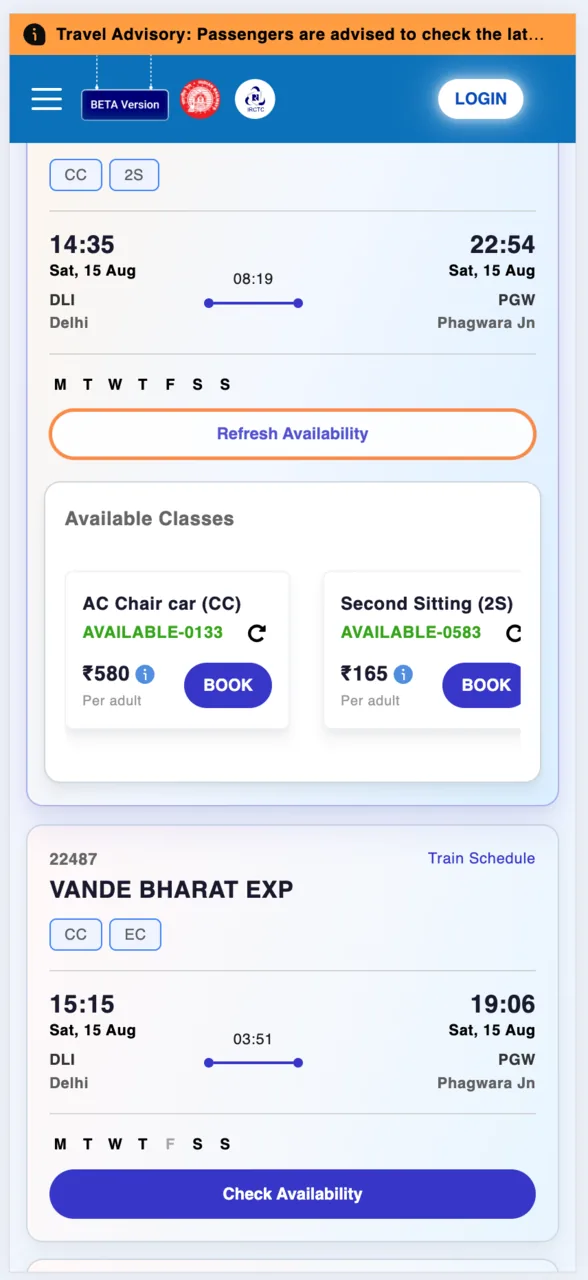
Step 9
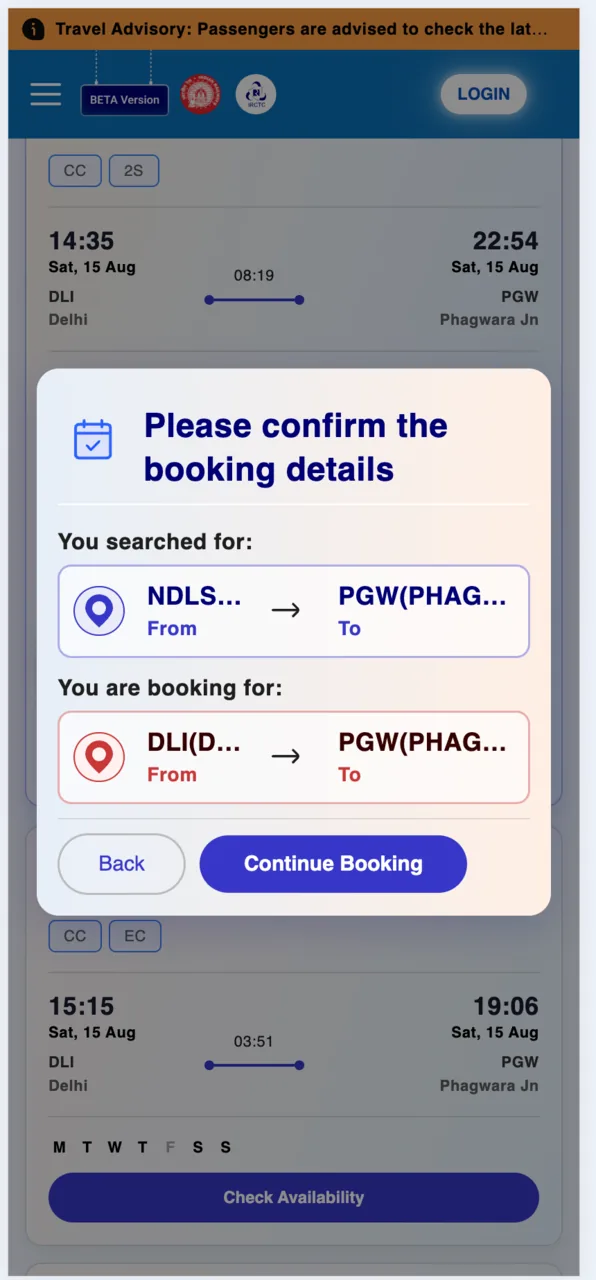
If the train starts from a nearby station, IRCTC asks you to confirm. Tap Continue Booking.
Step 10
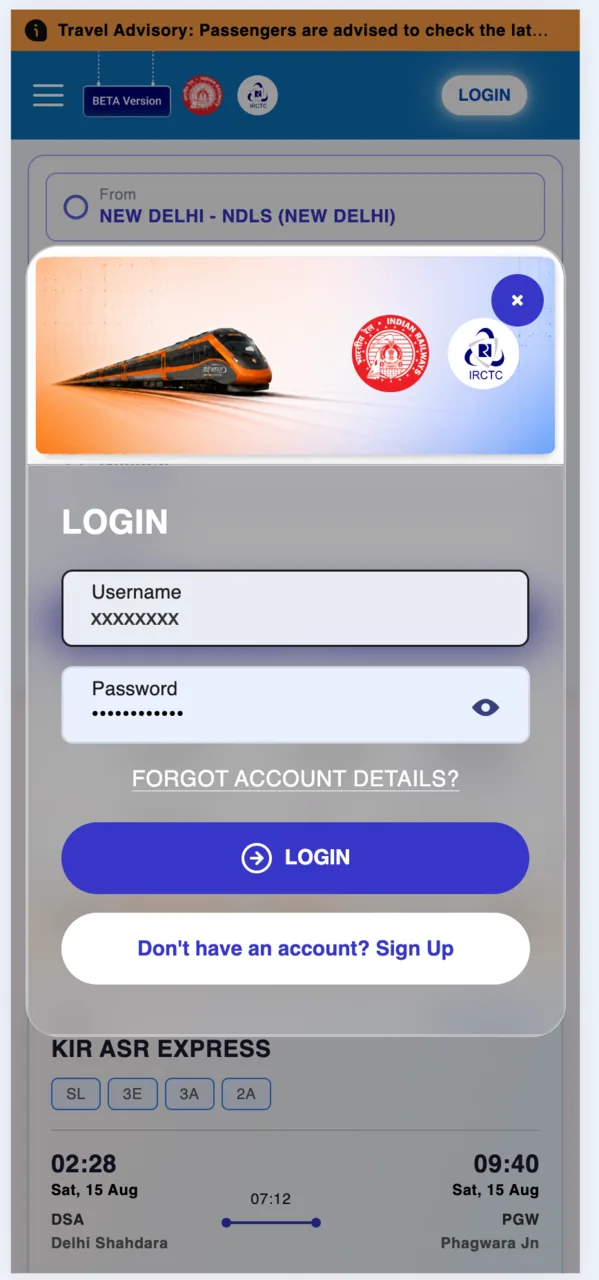
Sign in with your IRCTC username and password.
Step 11
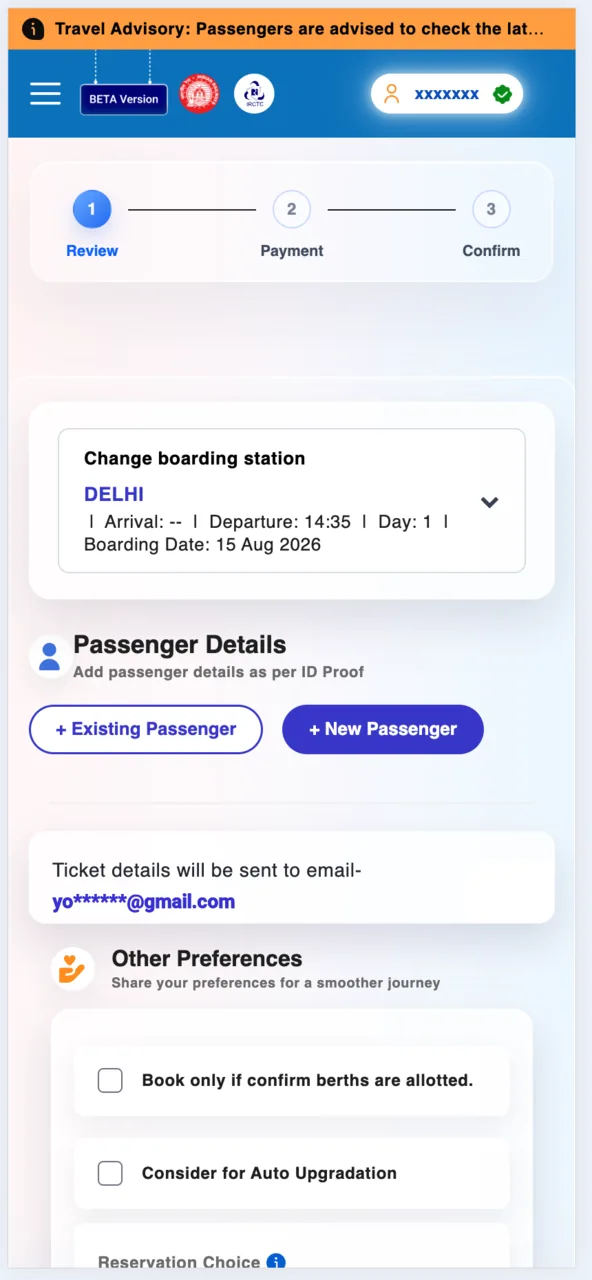
Check the boarding station, then tap + New Passenger.
Step 12
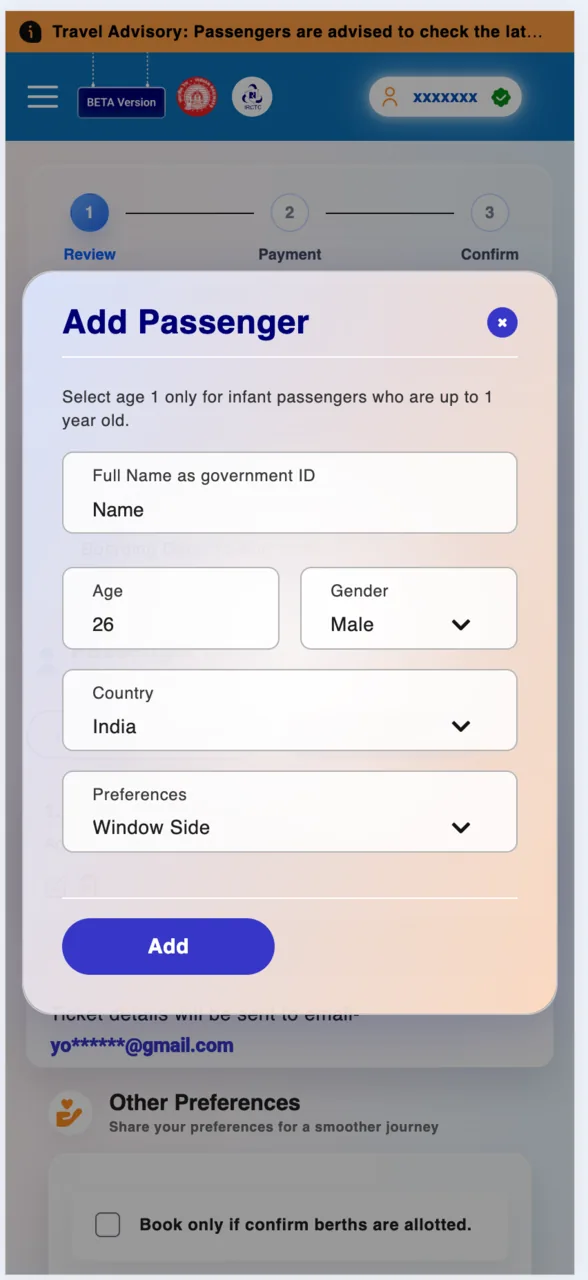
Enter the name exactly as on the government ID, plus age, gender and berth choice.
Step 13
Your passenger is added. Repeat for everyone travelling with you.
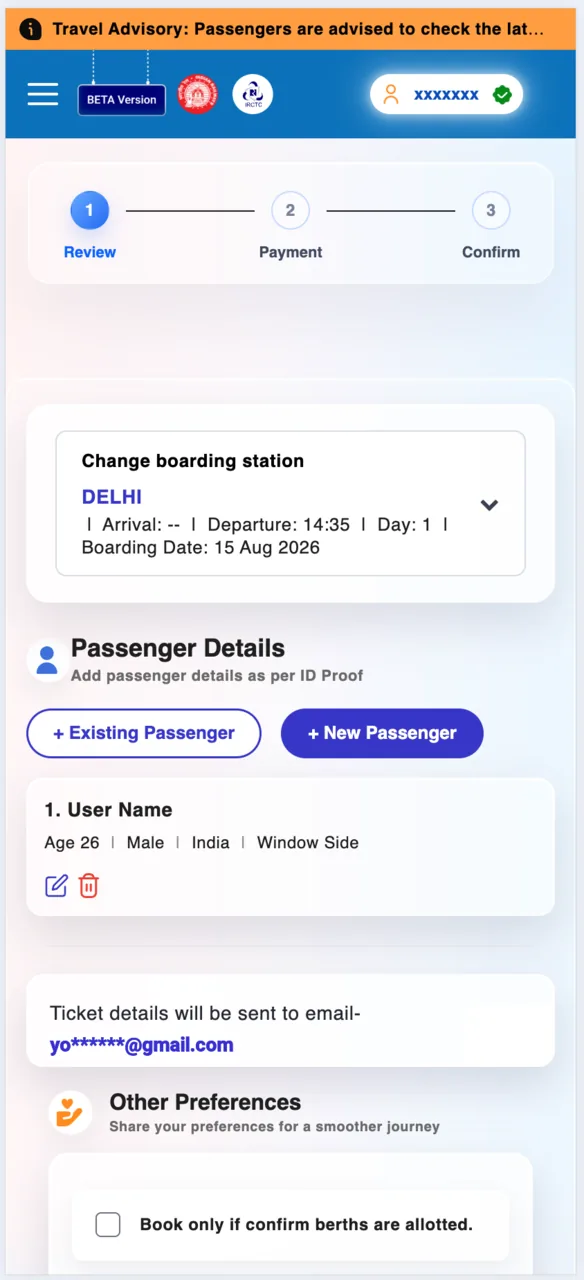
Step 14
Tick Book only if confirm berths are allotted so you are not left with a waitlist.
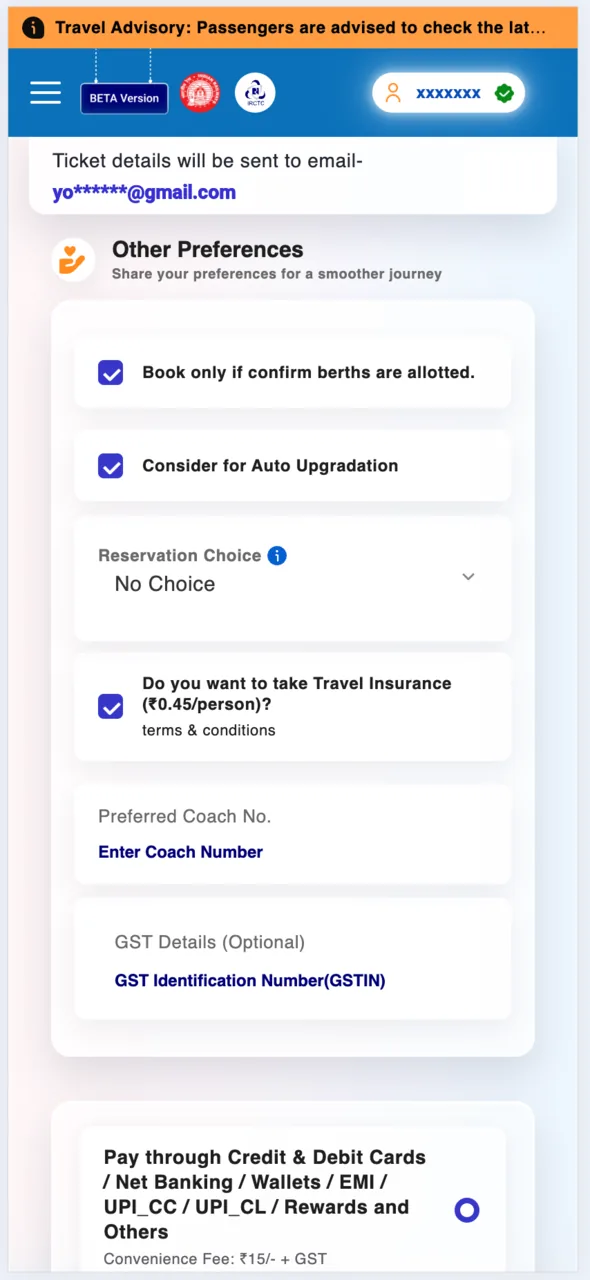
Step 15
Choose BHIM/UPI — its convenience fee is ₹10 instead of ₹15. Tap Calculate Fare.
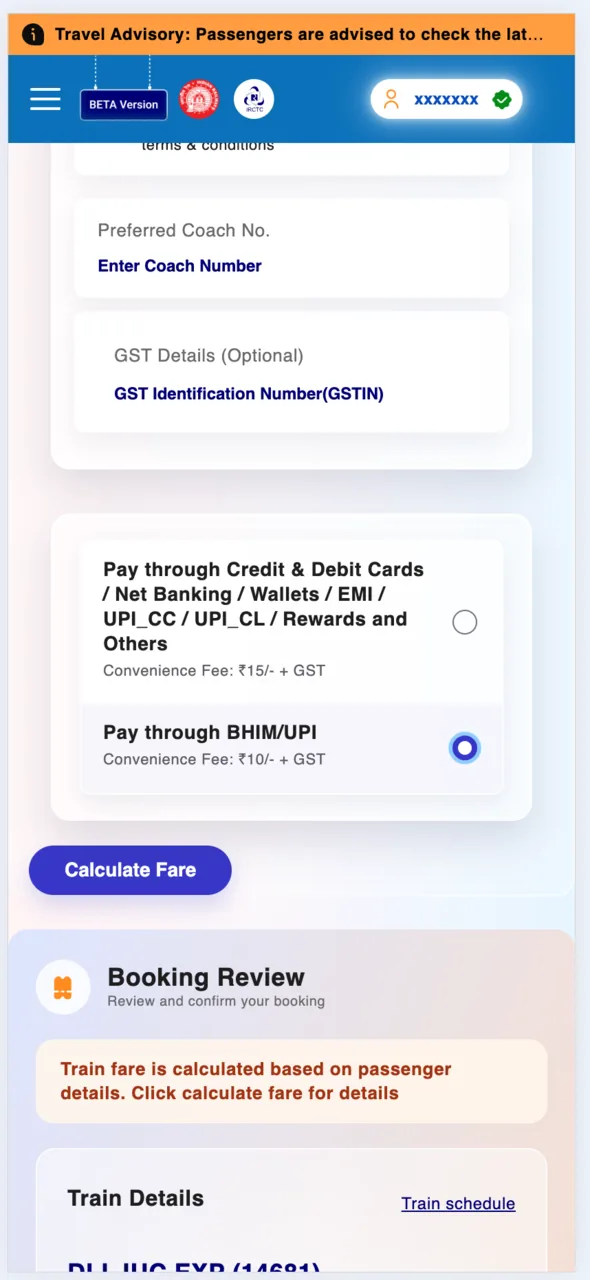
Step 16
Check the full fare breakup, then tap Continue To Payment.
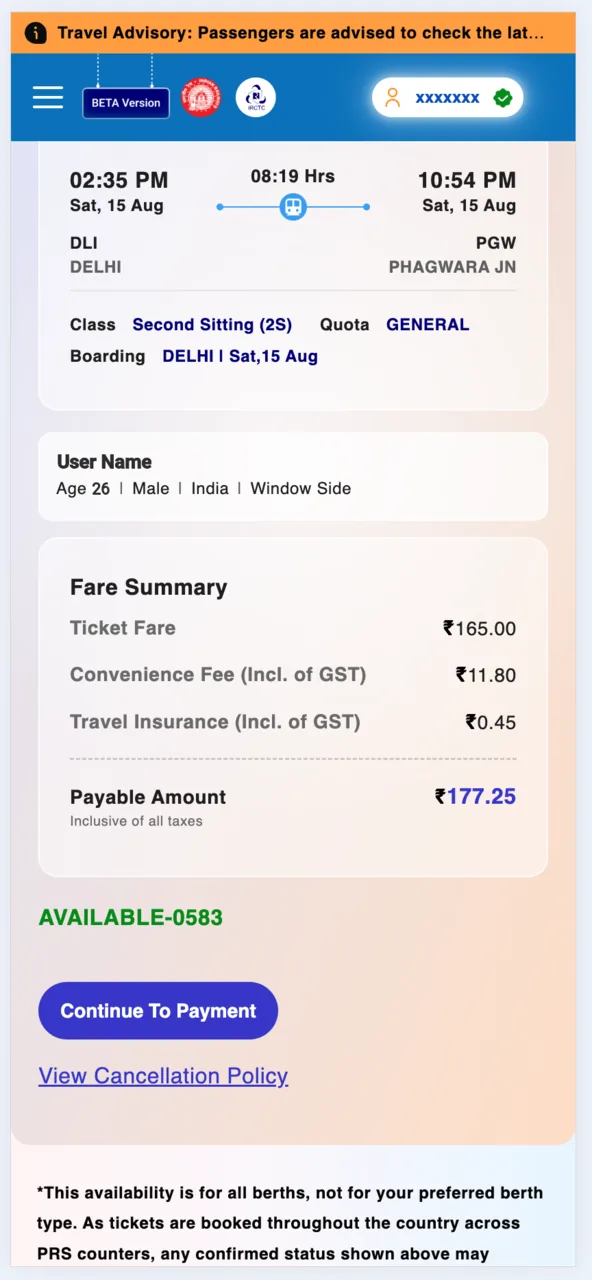
Step 17
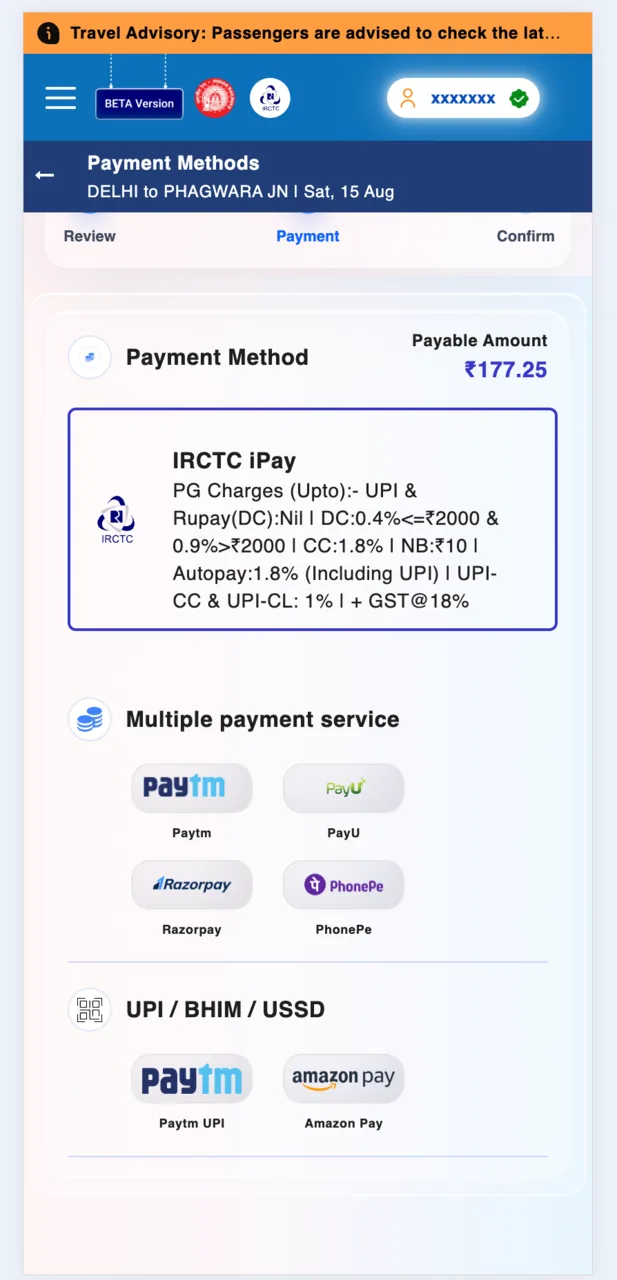
Pick a payment gateway. IRCTC iPay or any UPI option works.
Step 18
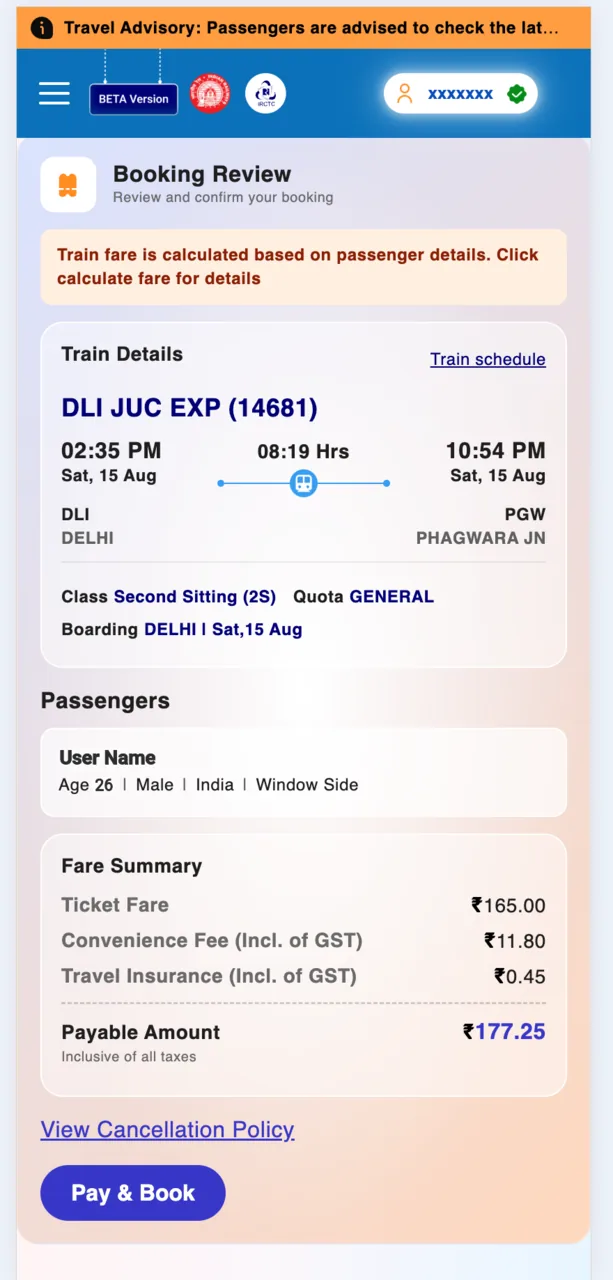
Give the booking one last look, then tap Pay & Book.
Step 19
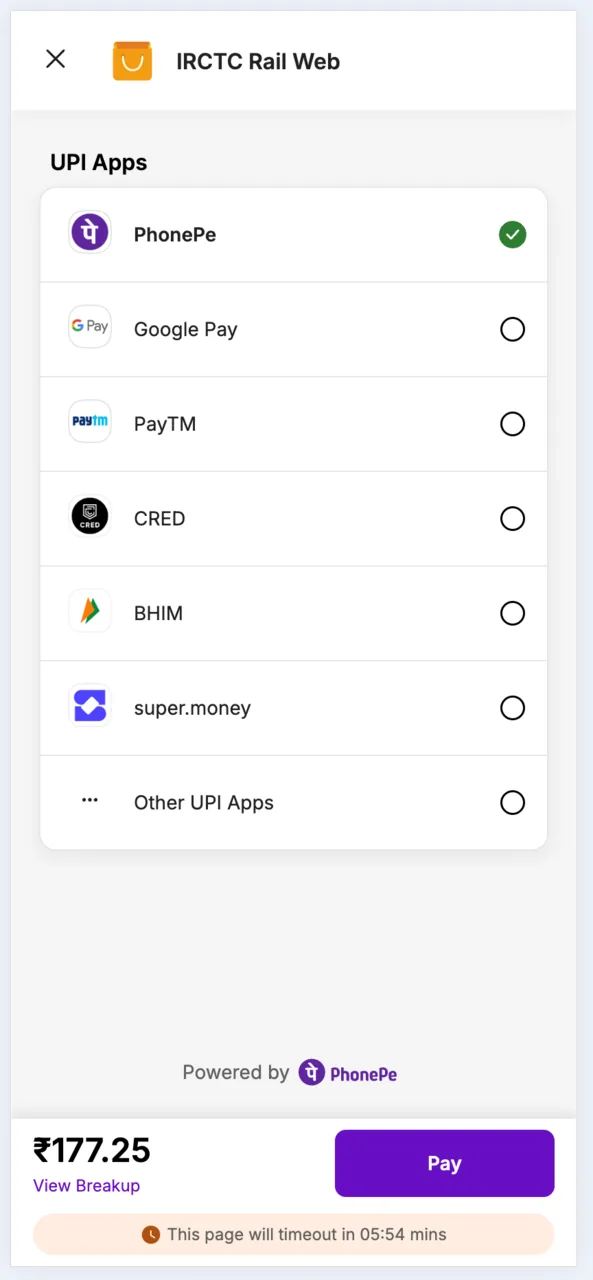
Choose your UPI app and tap Pay. Finish before the timer runs out.
Step 20
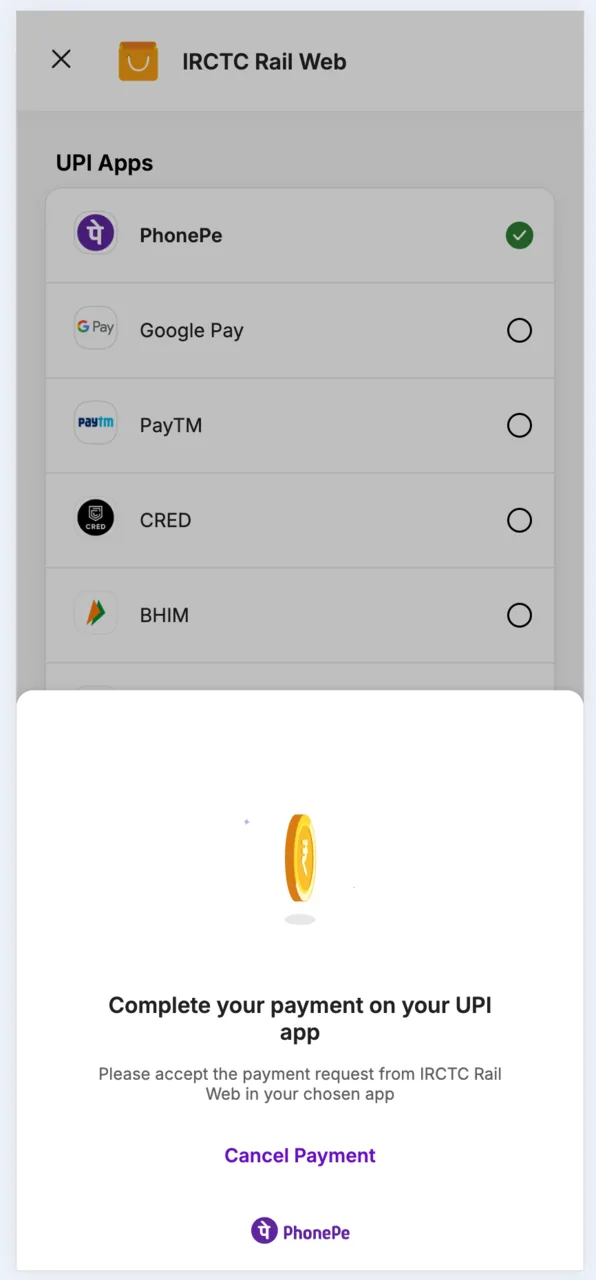
Approve the payment request in your UPI app. Do not close this page.
Step 21
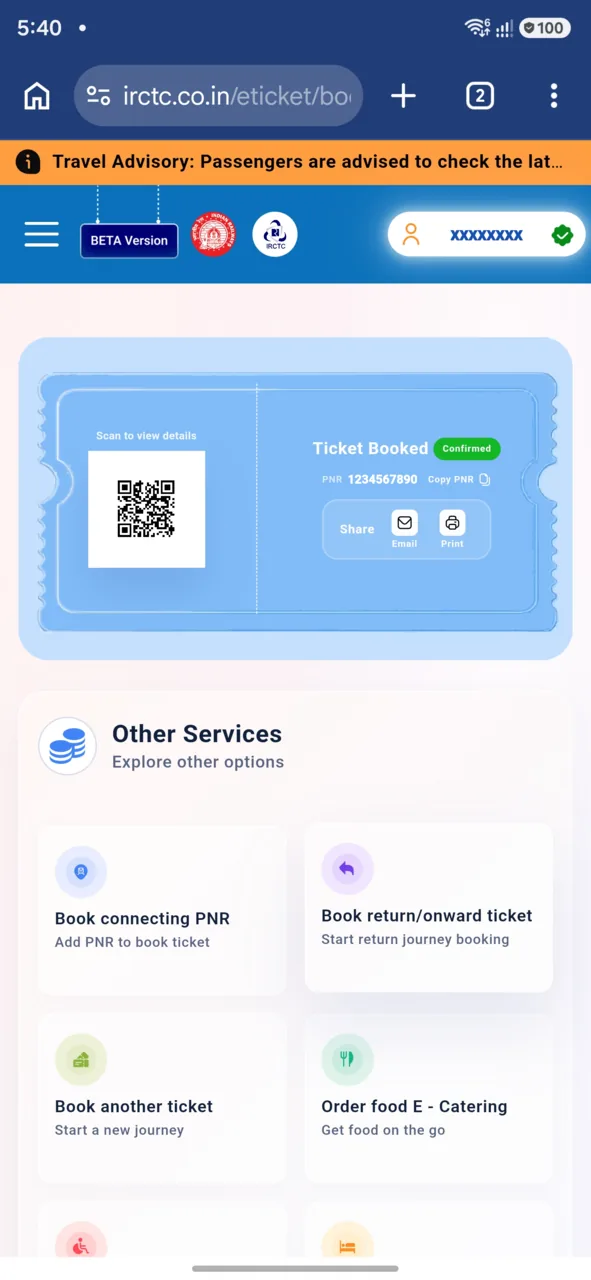
Done — your ticket is confirmed. Note the PNR; track it any time in EasyTrain.
Four things worth knowing before you start
- Pay with UPI to save on fees. The convenience fee is ₹10 + GST for BHIM/UPI versus ₹15 + GST for cards, net banking and wallets. On a ₹165 ticket that is a real difference.
- Tick “Book only if confirm berths are allotted”. If nothing confirms, the booking is dropped instead of leaving you on a waitlist.
- Enter names exactly as on the government ID. A mismatch at checking can cost you the ticket, and the name cannot be edited after booking.
- Watch the payment timer. The payment page expires in about six minutes; if it lapses you have to redo the booking, and the seat may be gone.
Frequently asked questions
Is the old IRCTC website still working?
Yes. The new portal is still labelled BETA and the older site remains available, so you can use whichever you prefer.
Why does IRCTC ask me to confirm the boarding station?
If the train starts from a station near the one you searched (Delhi vs New Delhi, for example), IRCTC shows a confirmation so you do not board at the wrong place. Check it carefully — the boarding station on the ticket is the one you must board at.
How do I check my ticket after booking?
Note the PNR from the confirmation screen. You can track its status, and your train's live running status, any time in the EasyTrain app.
Get EasyTrain free on Play Store
Check PNR status, track trains live, see seat layout and platform alerts — all without logging in.
Download EasyTrain